|
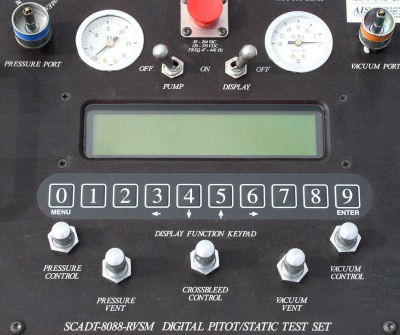
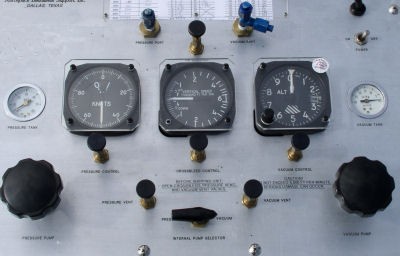
The Pitot/Static test unit is used to verify air data instrumentation and system interconnects. Proper operation of the tester is necessary for functional checks of altitude/airspeed related components. The unit is also helpful with troubleshooting of autopilot, pressurization, and flight control limitation systems.
When I use the tester for troubleshooting or functional checks, I like to have the unit in the cockpit while tests are run. This sometimes involves having numerous test hose segments to reach the static port, but direct observation of aircraft indications is preferred for comparison. I also like to verify that my test box inputs are not exceeding the component limits.
Digital equipment on newer aircraft is much more forgiving than older analog components that use mechanical bellows for measurement. I still practice techniques that would be used on analog components regardless of what is installed.
STARTING WITH THE BASICS
- Altimeter and IVSI indications are static (vacuum) controlled only.
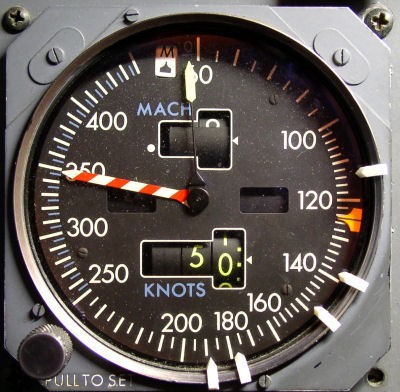
- Airspeed indication is derived from both pitot (pressure) and static inputs.
- If there is no difference between pitot and static pressures, airspeed will remain at 0 knots.
I like to perform checks in two steps. Pitot first, followed by static. This simplifies the difficulty of trying to keep the airspeed in limits while the aircraft is at altitude. The crossbleed valve enables an aircraft system to be driven to all operational altitudes without concern about airspeed exceedance.
PITOT / AIRSPEED CHECKS
- Pitot pressure checks are accomplished with the pressure side of the tester only. Fully closing the crossbleed control valve will isolate the two sides.
- Before starting the electric pump or hand pumping the pressure handle, verify the pressure control valve is closed. If the valve is partially open, the airspeed indicator will tend to get pissed off, most likely because it was just driven from 0 knots to 500 knots+ in a split second. NOT GOOD.
- Verify pressure bleed valve is closed.
- Slowly begin to bring the pressure control open. By using small changes of the control valve, airspeed can be driven to the desired value.
- I have found that using the electric pump to pressurize the pitot system is not needed. A few pumps of the pressure handle is more than enough of a tank charge to take all three systems on a aircraft the size of a DC-10 to the Barber Poll or Vmo needle (Vmo is short for velocity maximum operating limit).
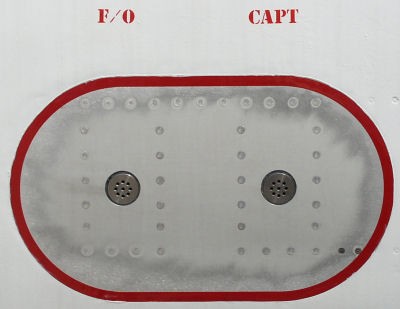
- It is good practice to go ahead and take airspeed over the Barber Poll needle to verify the overspeed warning system is operating normal. If the aircraft has two overspeed systems and both the Captain's and F/O's airspeeds are above Vmo, isolate the systems one at time by pulling the overspeed warning (clacker) circuit breakers. Newer aircraft use the air data computers for overspeed sensing.
- Airspeed can be reduced to 0 knots by slowly opening the pressure bleed valve.
- The point cannot be stressed hard enough. ALL VALVE ADJUSTMENTS FOR BOTH PITOT AND STATIC NEED TO BE DONE VERY SLOWLY. Air data instrumentation does not like to be blasted.
- Leaks are sometimes noted while accomplishing a pitot check. More often than not, the problem is with the hose or adapter connected to the probe itself. Adjustment might be needed to assure a tight fit.
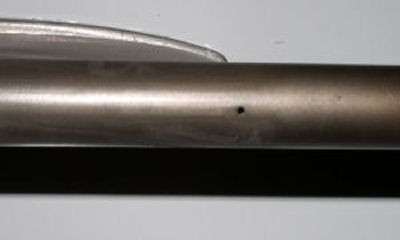
- Pitot probes have one or two small bleed holes near the base. These need to be taped over before starting any checks.
STATIC / ALTIMETER CHECKS
- As stated above, airspeed is a function of both pitot and static. If a vacuum is not bled over to the pitot side when performing altimeter checks the airspeed indicator will most likely be pegged out high around 5000' above field level. With the crossbleed valve open the airspeed indicator will remain at 0 knots and the aircraft can be taken to service altitude without fear of damaging the airspeed system.
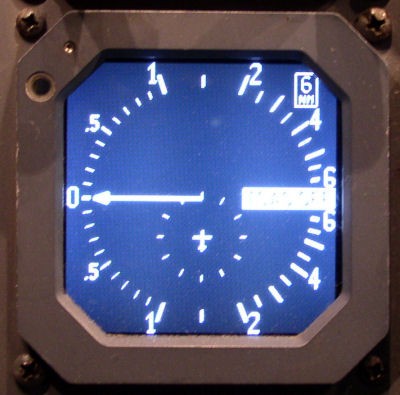
- The IVSI control valve should also be left open. The IVSI is used to verify altitude rate of change. As a general rule, never exceed 6000' a minute going up or down.
- Close all other valves before starting.
- Charge the vacuum tank with the electric pump if it is available. Leave the pump running, it will be needed. Unlike the pitot system, the static takes a considerable amount of suction to reach higher altitudes. Hand pumping a system to 35K is not fun.
- Slowly begin to open the static control valve. The altimeter can be driven to the desired value. The higher altitudes require opening the control valve more on the way up. Keep the IVSI within the 6000’ rate.
- Verify the airspeed indicator remains at 0 knots.
- Watch your hoses. Anyone stepping on or tripping over a hose might make it fall off the test port. If an airspeed indicator gets pissed from being driven to fast, an altimeter or air data computer will go into a rage if it is dropped from 40K to 0 all at once.
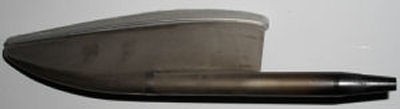
- Keep in mind that both pitot and static are being evacuated. If a small leak is noted in the 35K+ range it is most likely with the test connections or the tape on the opposite side static port. Newer aircraft that have the static port incorporated in the side of the pitot probe do not usually have this problem. I have found that static and pitot test adapters from Nav-Aids® provide a very tight connection.
- The system can be lowered by slowly opening the static vent valve. Again, do not exceed the 6000’ rate.
|
|
 |
|
Helpful Tips for Aircraft Pitot/Static Testing
- Leaks, at times cannot be verified to be with either the test setup or aircraft. Covering all associated ports/probes and pressurizing the aircraft is a good way to verify aircraft leaks. Static leaks would be indicated by the altimeter driving down. Pitot leaks would cause the airspeed indicator to drive up. Either of these problems would be noted almost right at the beginning of pressure differential increase.
- I tend not to trust the newer "totally automatic" pitot/static testers. I have seen "run-a ways" by these testers not being operated correctly. I still prefer the manually operated RVSM digital testers to the automatics. The last time I checked, air data components were mighty expensive to replace. The boss man always enjoys it when he is told a unit got smoked. If you're not totally familiar with an automatic test unit, don't use it.
- It should be noted when accomplishing altitude checks that the airspeed indicator Vmo needle will drop as the static system is driven higher. This is proper; overspeed indication is a function of altitude.
- Springtime is noted for mud dauber wasp nests in pitot system lines. The usual result of this is an aborted takeoff for airspeed splits. If blockage is suspected, tie into both pitot systems. While watching the airspeed indicators in the cockpit, apply pressure to simulate a quick airspeed climb, if one is slower to increase, it is almost guarantied blockage is present. After the blockage is cleared with wire, blow outboard from the air data or airspeed indicator with nitrogen. Verify no other component is connected to that pitot system before hitting the system with regulated bottle pressure. I would never exceed 50PSI for clearing lines, if the blockage is still present while using higher pressures, a line will split open and require changing.
- Pitot/Static tester control valves use nylon seats. It is a good practice to open all the valves after tests have been run. This will keep the seats from warping. Trying to control the tester with leaking valves is very difficult. Opening the valves will also drain the tanks and provide for safe transportation if the unit is to be shipped on an aircraft.
|